
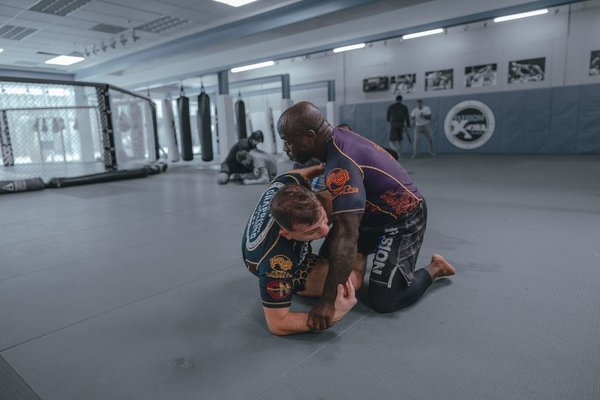
A good wrestling takedown begins before you touch an opponent’s legs. You need a balanced stance, a reason to shoot, and enough foot movement to finish after contact. For wrestling takedowns for beginners, the double leg takedown and single leg takedown are excellent starting points. Both teach timing and balance rather than relying on strength alone.
Build Your Stance Before Your Shot
Stand with your feet roughly shoulder-width apart and one foot slightly ahead. Bend your knees, keep your hips ready to move, and hold your hands in front. Your back should stay aligned and your eyes forward. Take short steps when circling or moving backward. Crossing your feet or standing tall makes you easier to attack.
Learn the Level Change and Penetration Step
A level change lowers your hips by bending your knees; it is not a forward bend at the waist. Next, take a penetration step that closes the distance to your opponent. Bring your trailing leg forward so you can keep moving. A knee may briefly touch the mat during some entries, but avoid dropping onto both knees and stopping.
Try ten slow repetitions without a partner. Lower your level, step in, recover your base, and return to stance. Smooth movement matters more than speed. A guide to wrestling stance and movement can reinforce the balance needed for every entry.
Create an Opening With a Wrestling Shot Setup
Shooting from too far away is a common beginner mistake. Your arms reach the legs, but your hips remain behind and the opponent can sprawl. Instead, use footwork and controlled hand fighting to make the defender step or move their hands.
A simple setup begins with light wrist contact. Encourage your partner to step or react, then lower your level as their lead leg becomes accessible. Another option is a supervised collar-tie movement or gentle snap that causes them to reset their stance. You are looking for a response, not trying to force the head downward.
For example, imagine your partner keeps the right foot forward. Circle slightly toward that side, make a light wrist touch, and watch whether the foot stays planted or moves closer. Attack only when your distance and posture are right. That small decision separates a planned entry from a desperate dive.
Double Leg Takedown: Entry and Finish
The double leg takedown targets both legs and introduces one of wrestling’s most recognizable offensive movements. Begin close enough to reach the hips after a short penetration step.
Get Close and Connect
Use a setup, lower your level, and step between or near the opponent’s feet as your coach demonstrates. Keep your head up and safely beside the torso, not pointed down into the mat. Bring your shoulder close and secure both legs around the knees or thighs. Pull your trailing foot underneath you to regain a strong base.
Turn the Corner to Finish
Once connected, move your feet rather than trying to lift with your back. Drive in short, controlled steps and change the angle to disturb the opponent’s balance. Wrestlers call this turning the corner. Guide your partner to the mat under control, then establish a stable top position.
If the opponent sprawls before you have a secure grip, avoid forcing your neck into the position. Reset and ask your coach to correct your entry distance or head placement.
Single Leg Takedown: Capture and Control
The single leg takedown is useful when one foot is closer than the other. Create an opening, lower your level, and step toward that leg. Wrap both arms around it, keep your shoulder close to the defender, and maintain a neutral head position.
Bring the captured leg toward your body while recovering your stance. Do not hang at the end of the leg with your head down. The opponent may hop or turn, so adjust your feet and keep your balance instead of pulling harder.
Choose a Controlled Finish
One beginner option is to stand with the captured leg secured and step to an angle that removes the opponent’s balance. Another, taught with close supervision, is the running-the-pipe finish: maintain control and circle while safely lowering the defender. Never twist the knee or wrench a trapped leg.
Learning single leg takedown defense alongside the entry helps you understand how a defender hops, turns, or squares their hips to resist. That knowledge improves your timing.
Fix Mistakes That Stall Beginner Wrestling Moves
Several errors appear across both takedowns. Reaching before stepping leaves your hips too far away. Looking down weakens posture. Stopping on your knees prevents a finish. Attacking without a setup gives the opponent time to react. Releasing the legs immediately after the takedown can cost you control.
Correct one issue per session. If the entry consistently stops short, focus on closing distance and bringing the trailing foot through. A better penetration step often improves both shots.
A Short Practice Progression
Begin with stance and level-change repetitions on your own. Then work with a cooperative partner: practise five double-leg entries and five single-leg entries, pausing after contact to check balance. Next, add a controlled finish to each. Finally, let your partner take one predictable backward step so you can practise adjusting your angle.
Keep resistance light until your coach confirms that both wrestlers can maintain posture and land safely. A wrestling drills for beginners routine can reinforce footwork between supervised sessions. Careful repetitions beat rushing through sloppy shots.
Stay Safe and Learn Your Ruleset
Train on proper wrestling mats, warm up, remove jewellery, and use a qualified coach or experienced supervisor. Tell your partner how much resistance to give. Stop immediately for pain, loss of control, or a request to stop. Never slam a partner, force a joint, or drive pressure through a bent neck.
Rules vary between folkstyle, freestyle, and Greco-Roman wrestling. Leg attacks are not permitted in Greco-Roman competition, so learn the rules used in your club before drilling these techniques in live wrestling.
Frequently Asked Questions
Which takedown should a beginner learn first?
Many coaches begin with the double leg because it develops a level change, penetration step, and moving finish. The single leg is another core option. Your coach can decide which best matches your skill.
Why do my wrestling shots keep getting stopped?
You may be too far away, looking down, or stopping your feet after contact. Start with a simple setup and have a coach check your distance before increasing speed.
Can I practise takedowns alone?
You can rehearse stance, footwork, level changes, and controlled penetration steps without a partner. Full takedowns need a safe mat, a cooperative partner, and supervision.
When should I use a single leg rather than a double leg?
A single leg often suits a position where one foot is exposed. A double leg may be available when you can enter close to both legs. Let the opponent’s movement guide your choice.
Make the Fundamentals Repeatable
Reliable takedowns grow from a clear sequence: stance, setup, level change, entry, and finish. Make each piece smooth before adding resistance or speed. Once you can complete both attacks safely with a partner, you will have a stronger foundation for the rest of your wrestling training.